
Stay Connected with Low Carb Glow

Mason Jar Low-Carb Lunch Prep

Looking for the complete system? Visit our Complete Low-Carb Meal Prep Guide the full framework covering batch cooking systems, freezer strategies, beginner ramp-up plans, and every meal prep recipe on LowCarbGlow in one place.
low carb lunch meal prep can feel like one more to-do in a busy week, but it does not have to be complicated. I started packing my lunches in mason jars because I wanted fresh, crunchy salads that stayed tasty for days. The trick is smart layering and a few reliable ingredients. If you are new to planning ahead, this simple system pairs well with my favorite tips from this low-carb meal prep guide. I promise you do not need fancy tools, just some jars and a little rhythm. Let me show you how I keep things easy and delicious with my go-to Mason Jar Low-Carb Lunch Prep.
Introduction & Portable Lunch Appeal
There is something about a bright, ready-to-eat meal waiting in the fridge that makes midday feel calmer. Mason jars are portable, stack neatly, and seal tight so nothing leaks into your bag. They also make portion control simple. I can see my veggies, protein, and dressing layers, which keeps me honest about balance and helps me avoid random snacking. Bonus, the jars look pretty, and that small visual joy really helps me stay consistent during the week.
If you are into cooking once and eating twice, this method plays nicely with dinners you already make. Leftover chicken, steak bites, or roasted veggies fit right in. For more ideas that transition from dinner to lunch jars, peek at these easy low carb weeknight dinners.
Mason Jar Method
Let us talk jars first. I like wide-mouth quart jars for bigger appetites and wide-mouth pint jars for lighter lunches or sides. Wide-mouth is key so your layers slide in and out without a fight. If you are new, start with two quart jars and two pint jars to see what size you like. Glass stands up to dishwashers and microwaves, though I usually eat the salads cold or room temp.
Choose the right jars
Pick jars with screw-on metal lids or plastic reusable lids. Both seal well, but plastic lids are quieter if you work in a quiet office. Always dry the jars thoroughly before packing to reduce extra moisture inside. Keep a small reusable bowl at work if you prefer pouring your salad into a bowl instead of eating from the jar.
Why jars work for low carb
Mason jars protect delicate greens from soggy dressing thanks to the layering trick. They also make it easy to rotate proteins and vegetables so your meals do not get boring. Last thing, jars keep you mindful of how much creamy dressing you add. That helps you hit your goals with Mason Jar Low-Carb Lunch Prep without counting every bite.
For a savory, meal-prep friendly option that packs a punch, I often cook a batch of this quick low carb ground beef stir fry and layer it into jars with crunchy veggies.
Ingredients List
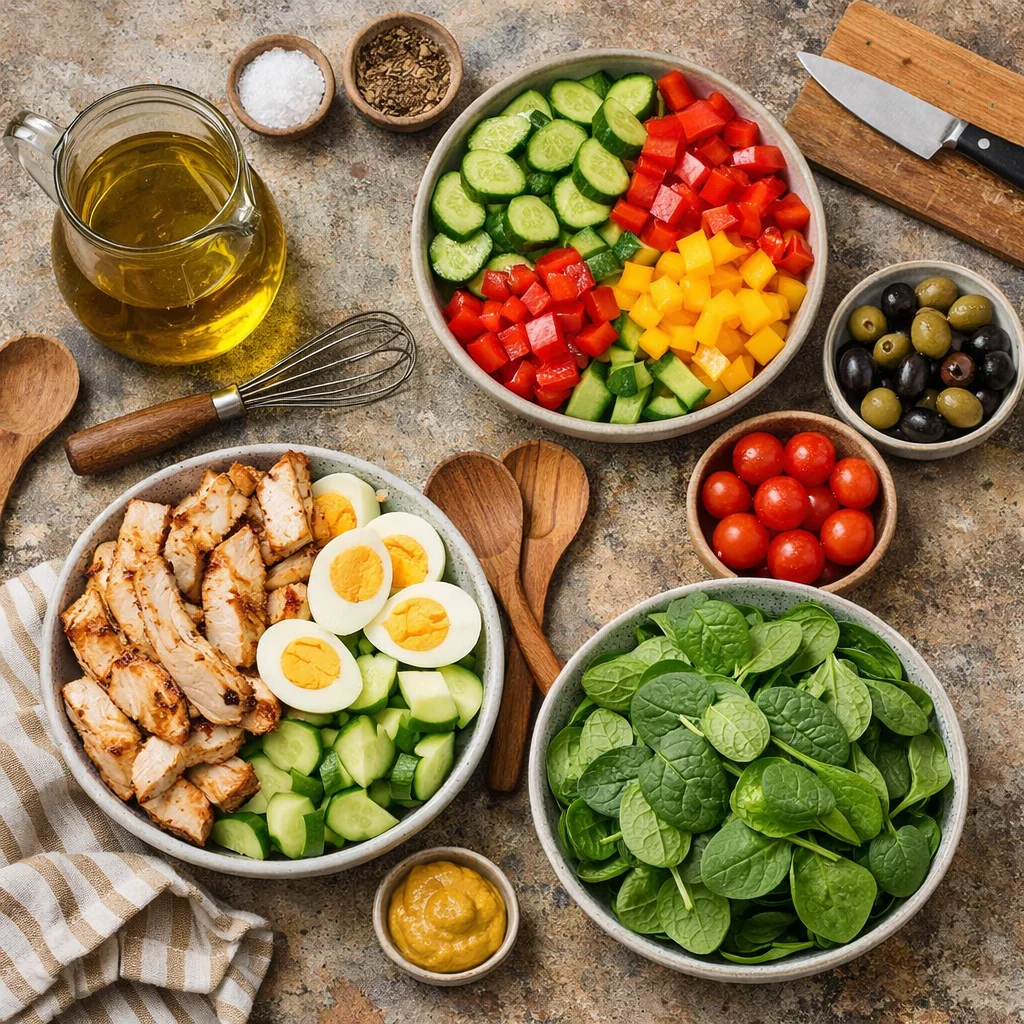
Here is a simple base list that makes five hearty lunches. Adjust amounts to suit your appetite and your jars.
- Dressing: 3/4 to 1 cup total for five jars. Use olive oil and vinegar, ranch, Caesar, or a lemon tahini. Keep it lower in carbs and sugar.
- Crunchy base veggies: 5 cups total. Chop cucumbers, bell peppers, celery, and red onion. These form the barrier between dressing and greens.
- Proteins: 5 cups total, about 3 to 4 ounces per jar. Choose chicken breast, rotisserie chicken, steak bites, turkey, boiled eggs, tuna, or tofu.
- Leafy greens: 5 packed cups. Use romaine, baby spinach, arugula, or a spring mix.
- Extras: 1 to 2 cups total. Try cherry tomatoes, olives, sliced pickles, shredded cheese, avocado (add day of), or nuts and seeds.
- Flavor boosters: Fresh herbs, lemon wedges, pepperoncinis, or a squeeze packet of mustard.
That is your blueprint. Swap in seasonal veggies and different dressings so your Mason Jar Low-Carb Lunch Prep never repeats the same exact flavors two days in a row.
Layering Strategy
The order that keeps it crisp
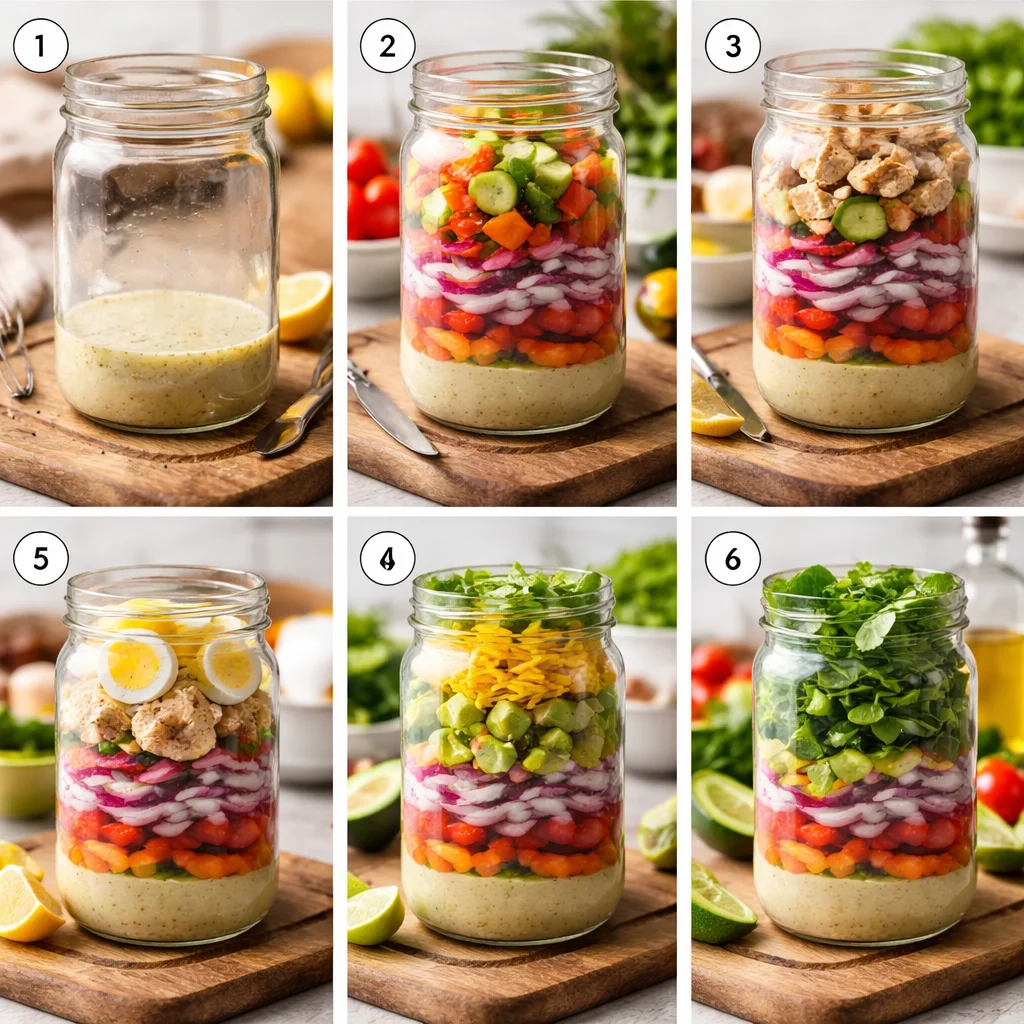
Layering is your best friend. Start with dressing on the bottom. Then add the sturdy veg, followed by your protein, then any extras like cheese or nuts, and finally the greens on top. Push the greens in gently so the jar is full but not crammed. Air pockets let things shake and mix better later. When it is time to eat, shake the jar hard or pour the contents into a bowl and toss with a fork.
Here is a typical build that works every time for Mason Jar Low-Carb Lunch Prep:
Bottom: 2 to 3 tablespoons dressing. Next: 3/4 cup of crunchy veg like cucumbers and peppers. Then: 3 to 4 ounces of protein. Next: 2 tablespoons extras like olives and cheese. Top: 1 cup greens. Done.
Dressing Placement
Keep the dressing on the bottom. That one move prevents soggy greens and slimy textures. If you are using a thicker dressing, thin it with a tiny splash of water so it coats evenly when you shake. For vinaigrettes, a squeeze of lemon wakes up the flavor after a few days in the fridge. Want to go zero risk on soggy? Pack dressing in tiny lidded cups and slide one into the jar on top of the greens. Just remember to remove it before shaking your salad into a bowl.
One more trick I love: keep two dressings for the week, like a bright lemon vinaigrette and a creamy ranch. That way your Mason Jar Low-Carb Lunch Prep tastes different even if the base ingredients match.
Protein & Vegetable Layers
Mix and match ideas
To build a tasty rotation, pair proteins with textures and herbs. Chicken loves dill and cucumbers with a mild ranch. Steak sings with arugula, tomatoes, and shaved parmesan. Tuna gets zippy with pickles, celery, and lemon. When I crave extra crunch, I’ll throw in a scoop of this low carb cabbage coleslaw. It holds up beautifully and keeps the whole jar crisp for days.
Vegetables that stand up to dressing include cucumbers, radishes, cabbage, celery, and carrots if you have a little room in your carb budget. Softer items like avocado, soft cheese, or fresh berries should go on top or be added the day you eat. It is a small move that keeps everything fresh and appetizing.
Meal Prep for 5 Days
Here is my simple routine. On Sunday night, I bake or grill two proteins. While they cook, I chop crunchy veggies and wash my greens. Then I line up my jars, add dressing and start layering. If you make five jars at once, aim to eat the ones with softer greens first and save romaine-based jars for later in the week. A tiny label on the lid can help you remember what is inside and which to eat first.
I also like to keep a back pocket option ready in the freezer for nights when I do not cook. If that is your vibe, you might love having a few servings of this creamy favorite to build into different jars through the week: creamy cabbage alfredo. Add grilled chicken and you are set.
Storage & Transportation
Keep it cold and crisp
- Store jars in the coldest part of your fridge, not on the door.
- Do not overfill with greens so the lid seals tightly.
- Pack jars upright in an insulated bag with an ice pack.
- Add any super delicate items like avocado or soft herbs right before eating.
- Keep a fork and a napkin in your bag so you are never stuck.
If you like having a no-jar lunch once or twice a week for variety, these BLT chicken salad lettuce wraps are a perfect partner to your jar routine. Rotate them in so the week feels fresh.
Nutrition Information
Nutrition will vary with your dressing and extras, but here is a solid estimate for one quart-jar lunch with creamy ranch, chicken, lots of crunchy veg, and greens:
Estimated per jar: 380 to 450 calories, 8 to 12 grams net carbs, 28 to 35 grams protein, 22 to 30 grams fat. Vinaigrettes usually drop calories and fat, while adding cheese and olives bumps them up a bit. Choose your balance based on your goals.
faqs Common Questions
How long do the jars stay fresh?
Most jars stay crisp for 4 to 5 days if layered correctly. Eat softer greens earlier in the week and save romaine or cabbage-based jars for day four or five.
Can I shake and eat straight from the jar?
Yes. Shake hard with the lid on, then open and enjoy. If you want more mixing power, pour into a bowl and toss. Either way works.
What size jar should I use?
Quart jars are great for a full meal. Pint jars work for lighter lunches or as sides. If you are unsure, start with quarts and adjust later.
How do I keep the dressing from leaking?
Tighten the lid while the rim and threads are totally dry. Do not overfill the jar. Keep the jar upright in your bag. If leaks worry you, carry the dressing in a separate mini container.
Can I warm the protein before eating?
I do not heat jars with greens. If you want warm protein, keep it in a separate container and add it to the salad at lunchtime.
Your Lunch, The Easy Way
You now have a simple system for Mason Jar Low-Carb Lunch Prep that you can repeat with a different flavor each week. Dressings on the bottom, crunchy veggies in the middle, protein next, and greens on top. Keep your jars cold and add delicate bits at the last minute. That is the whole game. With a few Sundays under your belt, this Mason Jar Low-Carb Lunch Prep will feel like second nature.
If you are hunting for more midday ideas beyond the jar, you might love browsing these smart collections from other food lovers too: 48 Low-Carb Lunch Ideas and Recipes for Work and High Protein Low Carb Lunch Meal Prep: Smart Ideas. However you spin it, keep it simple, keep it tasty, and let your Mason Jar Low-Carb Lunch Prep carry you through the week with less stress and more crunch.
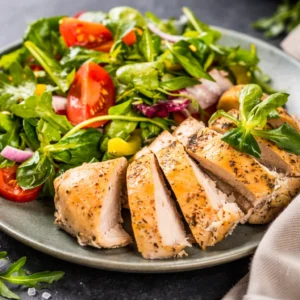
Mason Jar Low-Carb Lunch Prep
A simple and delicious low-carb lunch meal prep using mason jars for fresh salads that stay tasty for days.
Ingredients
- 3/4 to 1 cup dressing olive oil and vinegar, ranch, Caesar, or lemon tahini
- 5 cups crunchy base veggies cucumbers, bell peppers, celery, red onion
- 5 cups proteins chicken breast, rotisserie chicken, steak bites, turkey, boiled eggs, tuna, or tofu
- 5 packed cups leafy greens romaine, baby spinach, arugula, or spring mix
- 1 to 2 cups extras cherry tomatoes, olives, sliced pickles, shredded cheese, avocado, or nuts and seeds
- Flavor boosters fresh herbs, lemon wedges, pepperoncinis, or mustard
Instructions
- Layer 2 to 3 tablespoons dressing at the bottom of the jar.
- Add 3/4 cup of crunchy veggies on top of the dressing.
- Include 3 to 4 ounces of protein.
- Add 2 tablespoons of extras like olives and cheese.
- Top with 1 cup of greens, gently pushing them in to prevent air pockets.
- Repeat for additional jars, ensuring to layer consistently.
- When ready to eat, shake the jar or pour it into a bowl and toss to combine.
Notes
Use wide-mouth quart jars for larger meals and pint jars for lighter lunches. Keep packing simple and adjust ingredients based on personal preferences.